📦FREE SHIPPING ON ALL ORDERS🍄 Dismiss
Skip to content

Agar to agar transfer is the process of moving a small piece of healthy mycelium from one agar plate to another fresh agar plate. Mushroom growers use this technique to clean up cultures, expand healthy growth, select strong mycelium, and check culture quality before moving to grain.
Agar work gives growers a better way to observe what is happening with a culture. Instead of guessing whether a culture is clean, agar makes growth visible. If one part of a plate looks healthy while another part shows contamination, a transfer can help move the cleanest section onto a new plate.
This guide explains what agar to agar transfer is, why growers use it, what healthy mycelium looks like, when to transfer, and how the basic workflow works.
An agar to agar transfer means taking a small piece of colonized agar from one plate and placing it onto a fresh sterile agar plate.
The original plate may be:
The fresh plate gives the selected mycelium a new nutrient surface to grow across. This helps the grower continue working with the cleanest and healthiest part of the culture.
Agar transfers are a core part of mushroom culture work because they allow growers to choose what they want to keep and leave behind what they do not.
Agar transfers give growers more control over culture quality. By watching how mycelium grows on agar, you can choose clean, healthy, organized growth before expanding the culture further.
| Reason for Transfer | Purpose |
|---|---|
| Clean up a culture | Move healthy mycelium away from contamination |
| Expand a culture | Create more plates from one healthy plate |
| Select strong growth | Choose organized, fast, or even mycelium |
| Refresh old plates | Move mycelium onto fresh nutrients |
| Prepare for grain | Check culture quality before inoculating grain |
This is especially useful before moving a culture to grain. Grain takes more time, materials, and space than an agar plate, so it is better to check culture quality before using it.
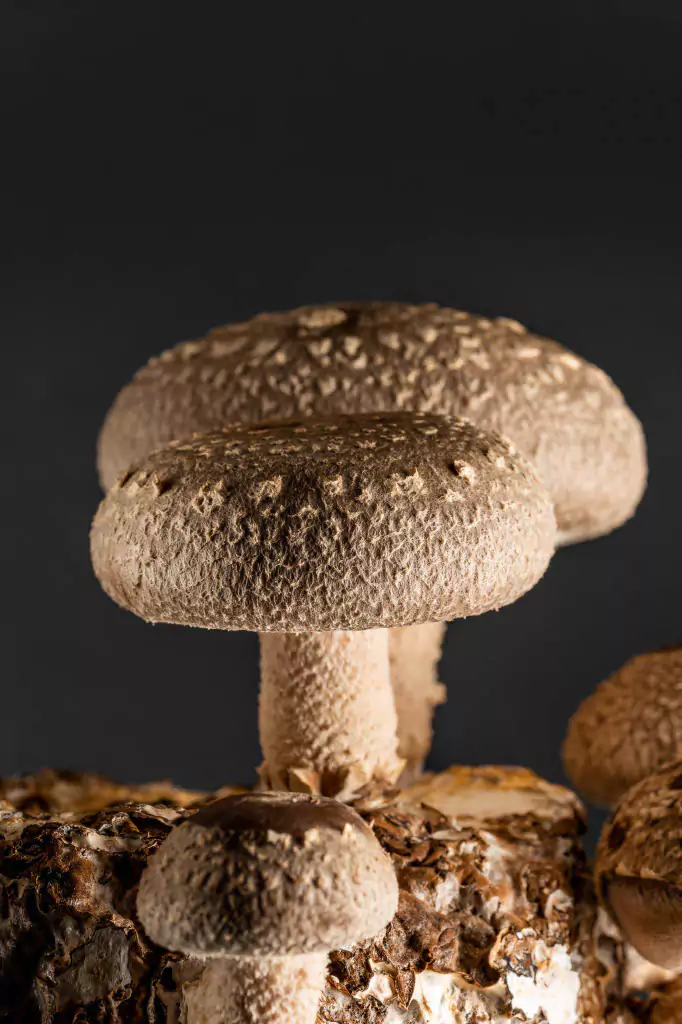
Healthy mushroom mycelium is usually white, organized, and consistent. Depending on the species and agar recipe, it may appear fluffy, cottony, flat, circular, or rope-like.
Healthy growth may show:
Not every healthy culture looks the same. Some mycelium grows thick and fluffy, while other cultures grow flatter and more structured. The main goal is to look for clean, consistent growth without obvious signs of contamination.
Contamination can appear in different forms. Some contaminants grow quickly and are easy to spot, while others may be more subtle at first.
| Warning Sign | Possible Issue |
|---|---|
| Green patches | Mold contamination |
| Black or dark spots | Mold or unwanted growth |
| Slimy texture | Possible bacterial contamination |
| Wet-looking areas | Possible bacteria or yeast |
| Colored spots | Unwanted microbial growth |
| Fast fuzzy growth away from the mycelium | Possible mold contamination |
| Sour or unusual smell | Possible bacterial contamination |
If a plate has contamination, the goal is not to save the entire plate. The goal is to identify a clean section of mycelium far away from the contamination and move only that piece to a fresh plate.
A plate may be ready for transfer when there is enough healthy growth to select a clean piece. You do not always need to wait until the plate is fully colonized.
A good time to transfer may be:
The leading edge is often the best area to choose from because it is the active outer growth zone where mycelium is expanding across the agar.
Waiting too long can make transfers harder, especially if contamination is also spreading on the plate.
The best transfer piece usually comes from clean, active, healthy mycelium. Many growers choose a small section from the leading edge of growth because that area is actively expanding.
Look for growth that is:
Avoid transferring from:
A small transfer piece is usually enough. Bigger is not always better. A smaller clean wedge can reduce the chance of carrying unwanted material from the original plate.

Before opening any agar plates, set up a clean workspace. Many growers use a still air box or laminar flow hood to reduce airborne contamination while plates are open.
Basic preparation includes:
A clean, calm workspace gives the transfer a better chance of success.
Look closely at the donor plate before making a transfer. Choose a section of healthy mycelium that is actively growing and far away from any questionable areas.
If the plate has contamination, select the cleanest section that is farthest from the contaminated area.
The goal is to transfer healthy mycelium, not to move a large piece of the original plate.
Agar plates should only be opened as much as needed and only for as long as needed. The longer a plate stays open, the more opportunity there is for airborne particles to land inside.
A basic transfer flow looks like this:
The goal is smooth, controlled movement. Rushing can cause mistakes, but leaving plates open too long also increases risk.
Place the agar wedge onto the fresh agar surface so the mycelium can recover and begin growing outward.
After placing the transfer, close the receiving plate and label it right away.
Useful label details include:
Example label:
Blue Oyster T2 - MEA - 6/1/26
Clear labeling prevents confusion, especially when working with multiple plates at the same time.
After the transfer, observe the new plate as it grows. The mycelium should begin expanding from the transferred piece onto the fresh agar.
A successful transfer usually shows:
If contamination appears again, another transfer may be needed from the cleanest section of the new plate.
In agar work, “T” usually means transfer.
| Label | Meaning |
|---|---|
| T1 | First transfer from the original plate |
| T2 | Second transfer |
| T3 | Third transfer |
| T4+ | Later transfers |
For example, if a grower starts with an original plate and moves a clean piece to a new plate, that new plate may be labeled T1. If a clean piece from T1 is moved to another fresh plate, the next plate becomes T2.
Transfer numbers help track culture history and make it easier to understand how many times a culture has been moved.
There is no perfect number of transfers. The right number depends on the condition of the original plate and the goal of the grower.
| Starting Point | Typical Transfer Need |
|---|---|
| Clean culture plate | One transfer may be enough |
| Germination plate | Often one to three transfers |
| Plate with contamination | Transfer until clean growth is confirmed |
| Mixed or uneven growth | Several transfers may help |
| Culture going to grain | Use only clean, confirmed growth |
The goal is not to reach a specific transfer number. The goal is clean, healthy, consistent mycelium.
Agar to agar transfer and agar to grain inoculation are different steps.
| Process | Purpose |
|---|---|
| Agar to agar | Clean, expand, refresh, or select a culture |
| Agar to grain | Move a clean culture onto sterilized grain |
Agar to agar is often done before agar to grain. This gives the grower a chance to inspect the culture before using grain.
This matters because grain is more expensive and time-consuming than an agar plate. A contaminated grain jar or bag can waste materials and slow down the growing process.
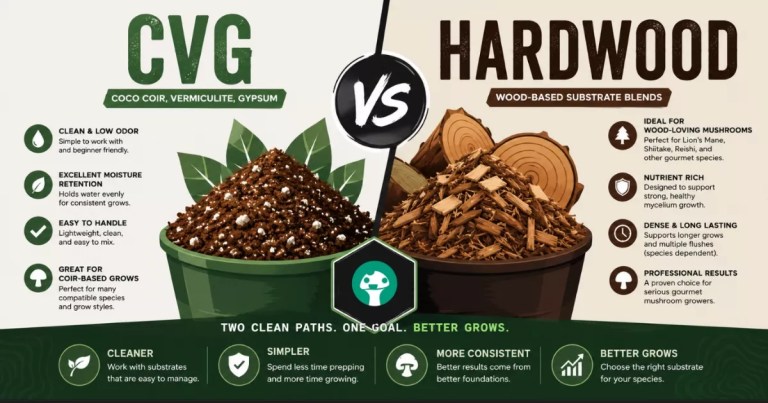
Many mushroom growers use agar recipes such as malt extract agar for agar transfers. The best agar depends on the mushroom species, grower preference, and the purpose of the plate.
| Agar Type | Common Use |
|---|---|
| Malt Extract Agar | General mushroom culture work |
| Potato Dextrose Agar | Common fungal culture medium |
| Water Agar | Sometimes used when trying to separate mycelium from contamination |
| Charcoal Agar | Sometimes used for contrast or specialized culture work |
For general mushroom agar work, malt extract agar is one of the most common options because it provides a dependable nutrient base for many mushroom cultures.
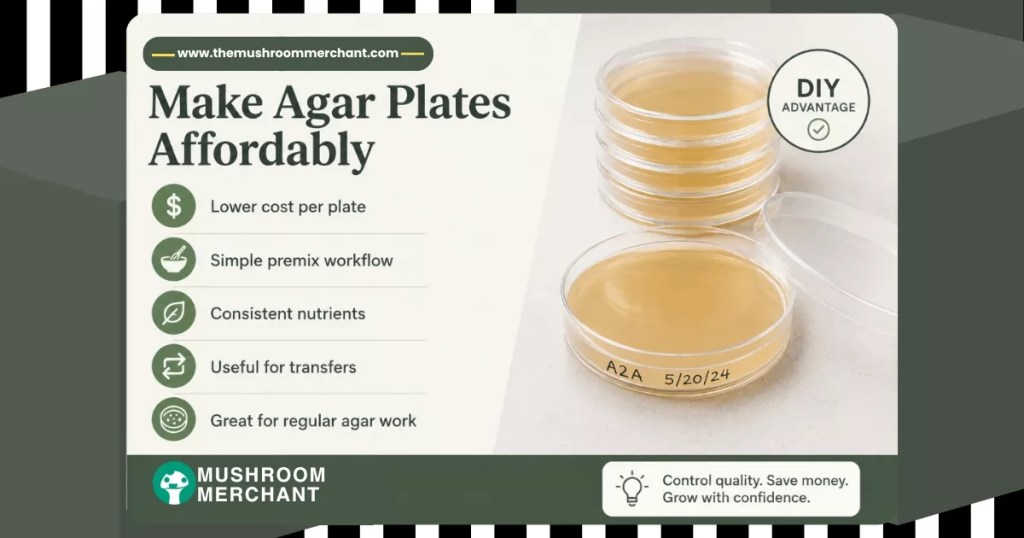
Agar transfers can use a lot of plates over time, especially when cleaning up cultures, expanding genetics, or practicing clean technique. Making your own agar plates can help lower the cost per plate and give you more control over your workflow.
Mushroom Merchant Malt Extract Agar Premix is made to simplify agar preparation by combining the core dry ingredients into one easy-to-use mix. Instead of buying and measuring multiple ingredients separately, growers can prepare nutrient agar plates with a more straightforward process.
This makes it a practical option for:
Making your own plates also gives you more flexibility. You can prepare plates when needed, keep better control over your workflow, and reduce the cost per plate over time.
Helpful supply: Mushroom Merchant Malt Extract Agar Premix
Open plates only when needed. Even in a clean workspace, open agar is vulnerable to airborne contamination.
If contamination is present, choose the cleanest healthy growth farthest away from the contaminated area.
A small wedge is usually enough. Larger pieces can carry more unwanted material from the original plate.
Fast, shaky movement can create mistakes. Smooth and controlled movement is better than rushing.
Unlabeled plates become confusing quickly. Always label the culture name, date, transfer number, and any useful notes.
If a plate looks suspicious, do not treat it like a clean culture. Transfer from the healthiest section and continue observing the new plate.
Agar to agar transfer is one of the most important skills in mushroom culture work. It helps growers clean up cultures, expand healthy mycelium, select strong growth, and make better decisions before moving to grain.
The basic principles are simple: work cleanly, choose healthy mycelium, transfer a small piece, label the new plate, and observe the results.
For growers doing regular agar work, making agar plates at home with a reliable premix can keep the process more affordable and repeatable. A good premix helps simplify preparation so you can focus on clean technique, culture quality, and consistent results.
An agar to agar transfer is the process of moving a small piece of mycelium from one agar plate to a fresh agar plate. Mushroom growers use this technique to expand cultures, clean up contamination, and select healthy mycelium.
Mushroom growers transfer agar to move healthy mycelium onto fresh nutrients, separate clean growth from contamination, expand a culture, or prepare a clean culture before inoculating grain.
Choose a clean section of healthy white mycelium, usually from the leading edge of active growth. Avoid areas near contamination, discoloration, slime, wet spots, or unusual textures.
A plate may be ready for transfer when there is enough healthy growth to select a clean piece. Many growers transfer before the plate gets old, before mycelium reaches contamination, or before moving a culture to grain.
The number of transfers depends on the culture. A clean plate may only need one transfer, while a contaminated or mixed plate may need several transfers until the growth appears clean and consistent.
Agar transfers can help separate healthy mycelium from contamination if there is still a clean section available. The goal is to move clean mycelium away from the contaminated area onto a fresh sterile agar plate.
Many growers transfer agar before going to grain because agar allows them to inspect the culture first. This helps reduce the risk of wasting sterilized grain on a contaminated culture.
Making agar plates at home can be more affordable over time, especially for growers doing regular transfers. A premix can make the process easier by reducing the need to buy and measure several separate dry ingredients.
Learn More About Mycology
Get updates and learn about growing mushrooms